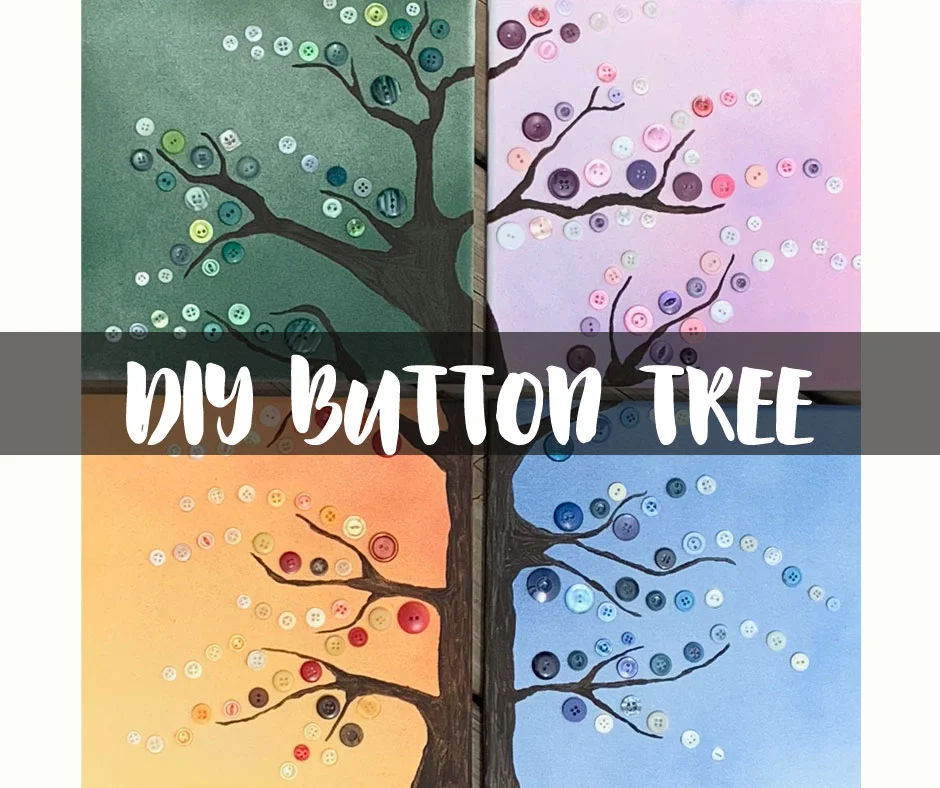
Did your mom or grandma have a button box or tin? I inherited mine from my mom. There are some old, old buttons in there and I love to look at them and wonder why mom had them. Today I have a use for all those old buttons for you! A button tree on canvas is a great all-season decoration for your home and it’s a fun craft for all ages!
I participate in the Amazon.com affiliates program. If you make a purchase after following one of my affiliate links (like the ones above) I earn a small commission, but it does not affect the price you pay. For more information please see my disclosure page.
Buttons are such a ordinary item. We use them everyday and never realize how amazing they are and not just for keeping our clothes on! I never knew that there were so many cool button crafts! Check out this Button Craft pinterest board that has MANY more beautiful ideas for making button arts and crafts. But first let’s make a Four Season Button Tree!
Materials needed to make a button tree craft
BUTTONS - old or new whatever works for ya!
4 Stretched Canvases of any size - mine were 10 inch squares
Spray paint - I used light and dark green, yellow, orange, light and dark blue, purple and pink all in a semi gloss sheen
Cricut or Silhouette machine (not needed if you can draw a tree)Contact paper - I get mine at the Dollar Tree or Transfer Tape or Press 'N Seal Brown acrylic paint
Gorilla glue or hot glue
Button tree craft instructions
1. Unwrap canvas from plastic.
2. Lay out on a drop cloth or do your painting outside in the grass.
3. Paint the canvases with a light coat of spray paint in each of your “light” colors. You will end up with 1 light blue, 1 yellow, 1 pink and 1 light green canvas. Allow to dry. It won’t take long!
4. Spray each canvas very lightly with the appropriate darker colors. (Light blue + dark blue. Yellow + orange. Pink + purple. Light green + dark green. Do another light coat of the darker color over one half of the canvas and then another coat on one corner(on the darker half) so you end up with one corner that has 3 coats of the darker color paint. Of course you can paint it more but this is a good starting technique. Allow to dry. Should look somewhat like the photo above on the far right.
5. Use a pencil to draw your tree across all the canvases or if you are tree drawing challenged like me and you own a Silhouette or Cricut just click this link to get the FREE SVG (and see all the other freebies I have available for my favorite peeps who get my newsletter and whom I love on a little bit extra every week). You can use the SVG to cut out a template using card stock or contact paper or just as a basic guide for drawing your tree..
Then use transfer tape, contact paper or press ‘n seal to “pickup” your contact paper template and place it on the canvas. Press it to the canvas & remove the “transfer” material you choose. Be patient with this step—it can be tricky. If you use card stock just lay it across your canvases and hold it down with your hand. Then draw your tree on with a pencil.
6. Use your brown paint to fill in the tree. Use a tiny brush or these handy screw on tips for your paint bottle(I got them at Michael’s). It doesn’t take much paint at all! Allow the tree to completely dry.
7. Sort your buttons into colors for each season. Also sort out smaller white buttons.
8. After the canvases are dry then lay the buttons on the canvases to see what colors look good with the seasonal colors that you painted.
9. Begin to arrange the buttons where you like them. Walk away. Come back and look again from far away. Rearrange the buttons 100x. Walk away again. Repeat as many times as you need. I added small white buttons to the ends of the colored areas too!
10. Use glue to attach the buttons to the canvases and allow to completely dry.
11. I found hanging the canvases was the trickiest part! Use a level and mark two spots on the wall for each canvas. Two nails keeps the canvas level!
Bring on the Crafts — A Craft & DIY Blog Hop

On the first Friday through Sunday of each month, a group of DIY and crafty bloggers join forces. Together Marie from The Inspiration Vault and Habiba from Craftify My Love they bring you the #BringontheCrafts blog hop. Each blogger creates a fun craft or DIY project to share that follows a monthly materials theme. July's theme is Buttons & Beads! Each blogger chooses their own craft to make as long as they love it and it uses Buttons & Beads in the project.
Our July Co-hosts
Jenny at Cookies, Coffee and Crafts • Marie at DIY Adulation • Beverly at Across the Blvd • Gail at Purple Hues & Me • Kim at Day To Day Adventures
Join in on the fun! If you'd like to participate next month, you can request to join our Bring on the Crafts Facebook Group. Next month's theme is Cutting Machines!
Not a blogger, but a creative mind none the less!? Don't worry, share your awesome creations in our Craft Cult Facebook Group. This is also a great place to ask craft & DIY related questions and find inspiration for your next project.More crafts to make!


